

Where is the best place to photograph the Dotonbori Glico sign?
The Glico sign in Japan is one of famous sightseeing spots that people take photos in front of. In front of the sign, you can see many people taking photos in the middle of Ebisubashi holding their hands up, mimicking the sign. Are there other places to take the photo other than Ebisubashi? Are there other poses that one could try? These are questions that we decided to tackle. The model Remi Sugimura helped us out by taking photos using a smartphone camera.
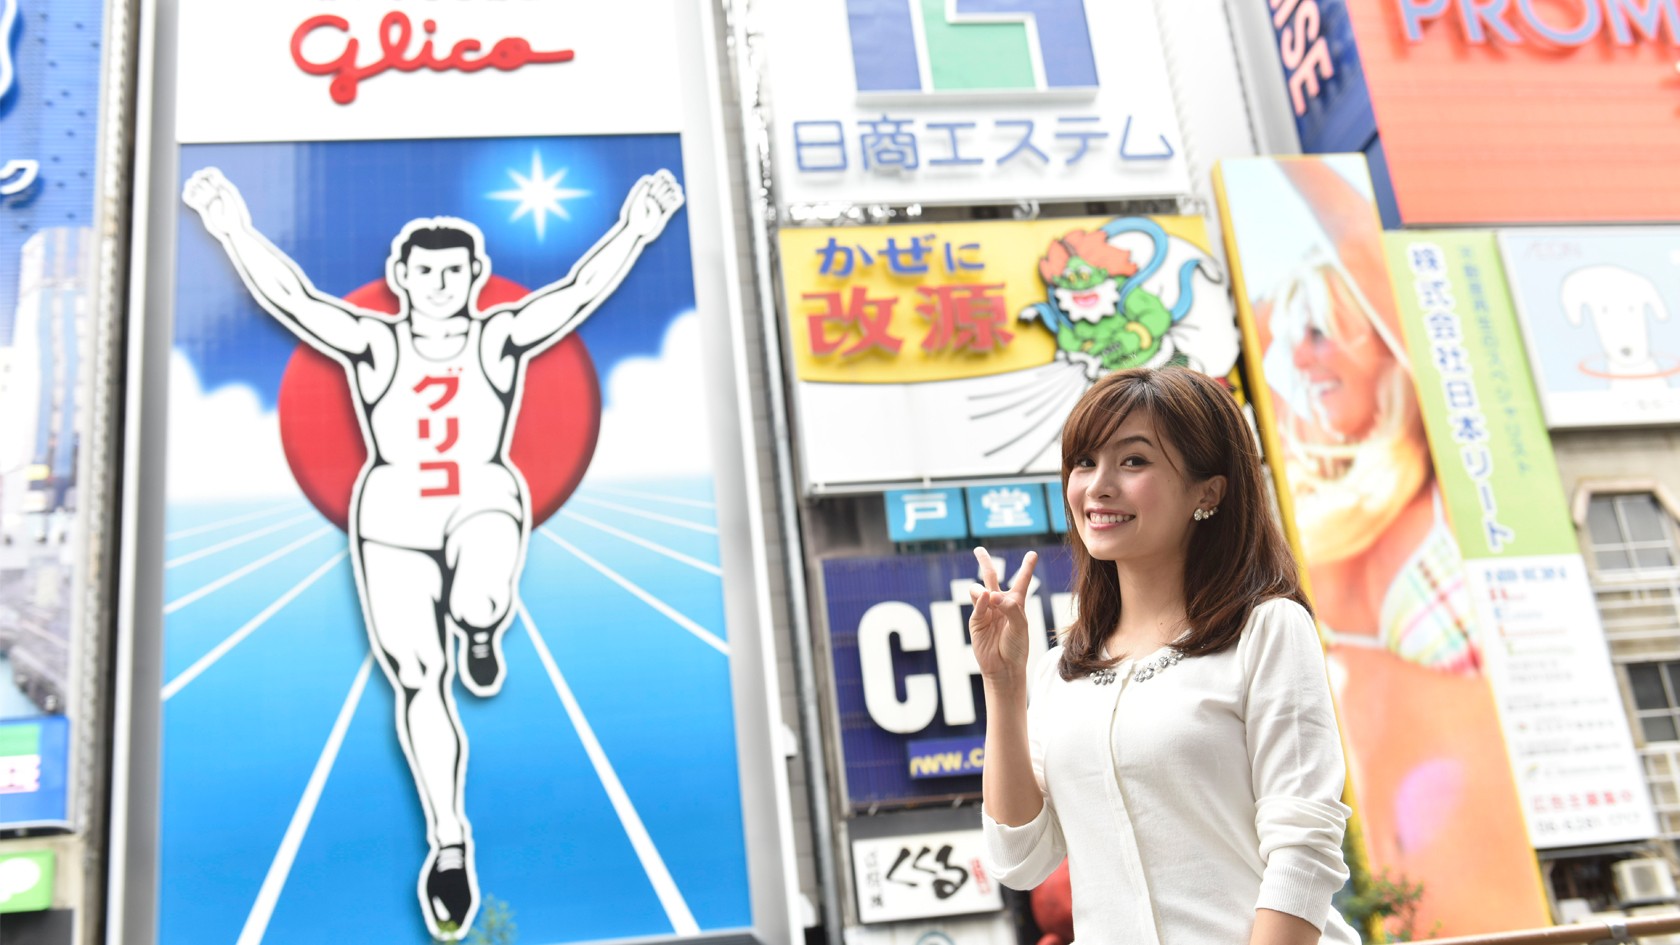
Location 1: Ebisubashi
First, a selfie on the standard Ebisubashi. It looks like the photo from a trip, and it came out quite well.
Location 2: Sidewalk
Next, we took a photo on the sidewalk down the stairs from Ebisubashi. Compared to Ebisubashi, there aren’t too many people, so it’s very easy to take a photo there. However, because there aren’t too many people, it’s hard to find someone to take a photo of you there, so it might be a little difficult.
Location 3: Tonbori Walk
Next is from the Tonbori Walk, the opposite river bank. It’s a great place where you can capture the whole front of the Glico sign. There were a lot of people taking photos here as well.
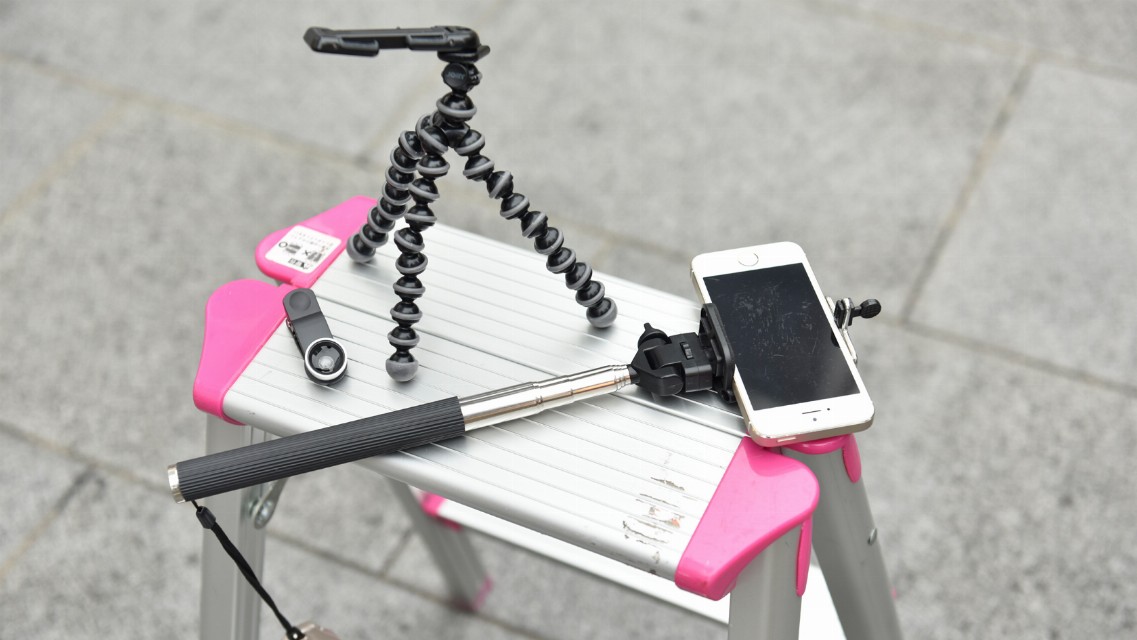
Next, we tried using tools. We had a selfies stick, a wide-angle lens, and a mini-tripod. We then tried photographing in the same spot on Ebisubashi to see how the results change.
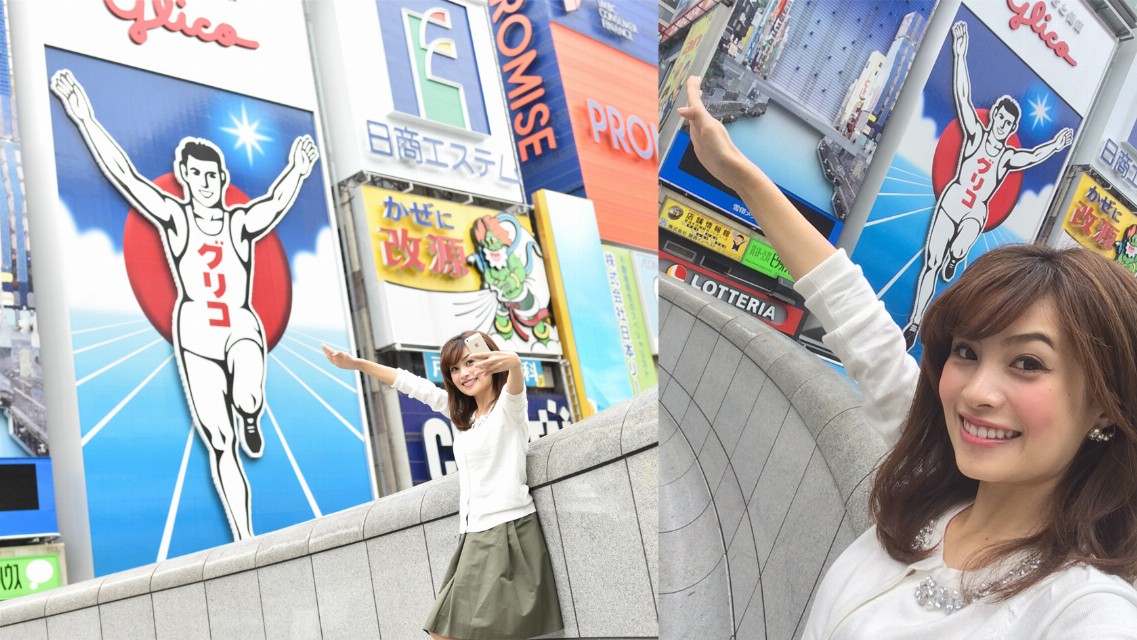
Method #1: selfie stick
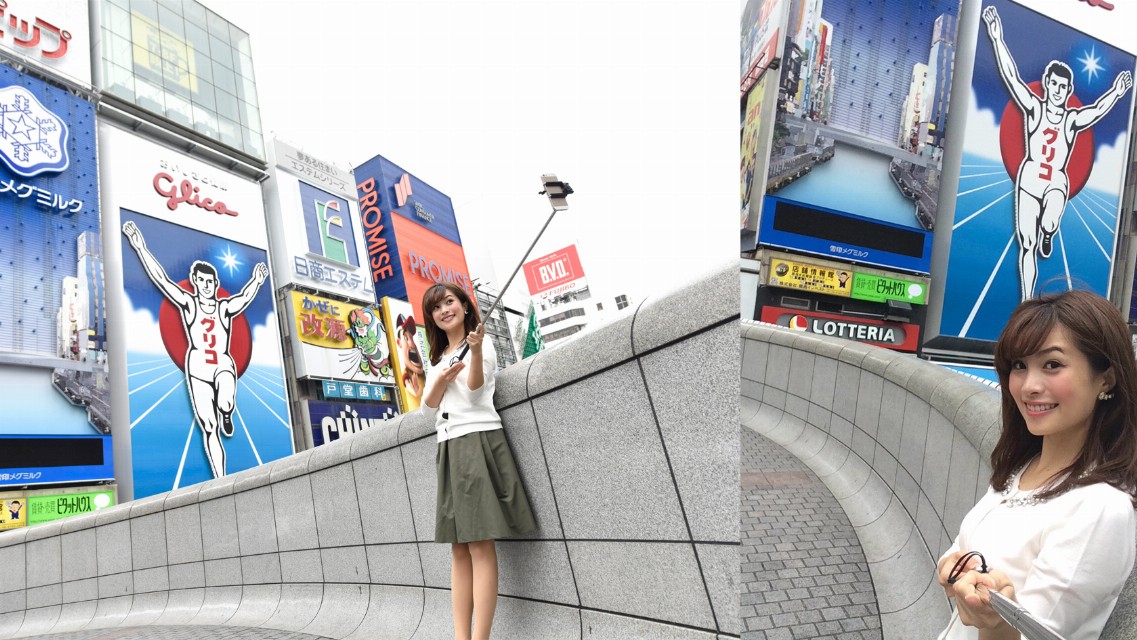
First we used the selfie-stick. You can get much more of your body in the photo in comparison to a regular selfie. For this photo we purposely made it so that you can see the stick, but the trick is to take the photo so that the stick can’t be seen in the photo.
Method #2: wide-angle lens
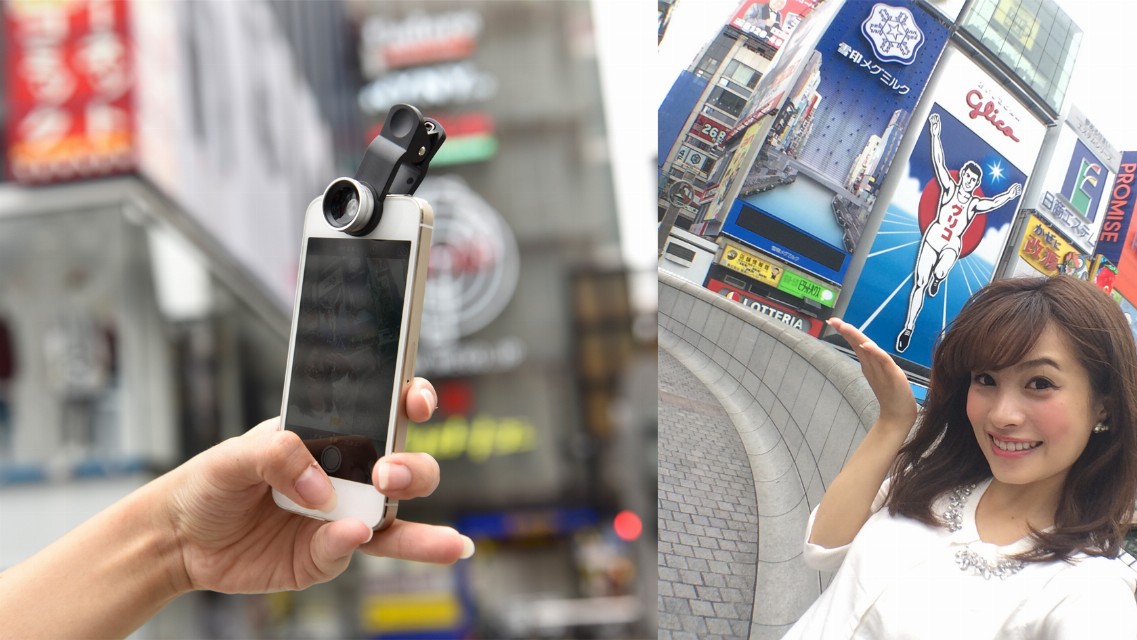
Next we used the popular wide-angle lens. It widened the width, but now it looks like the Glico sign is a little far…however, since you can get a lot more of Dotonbori in the picture, you end up with a photo that shows much more of what the area is like.
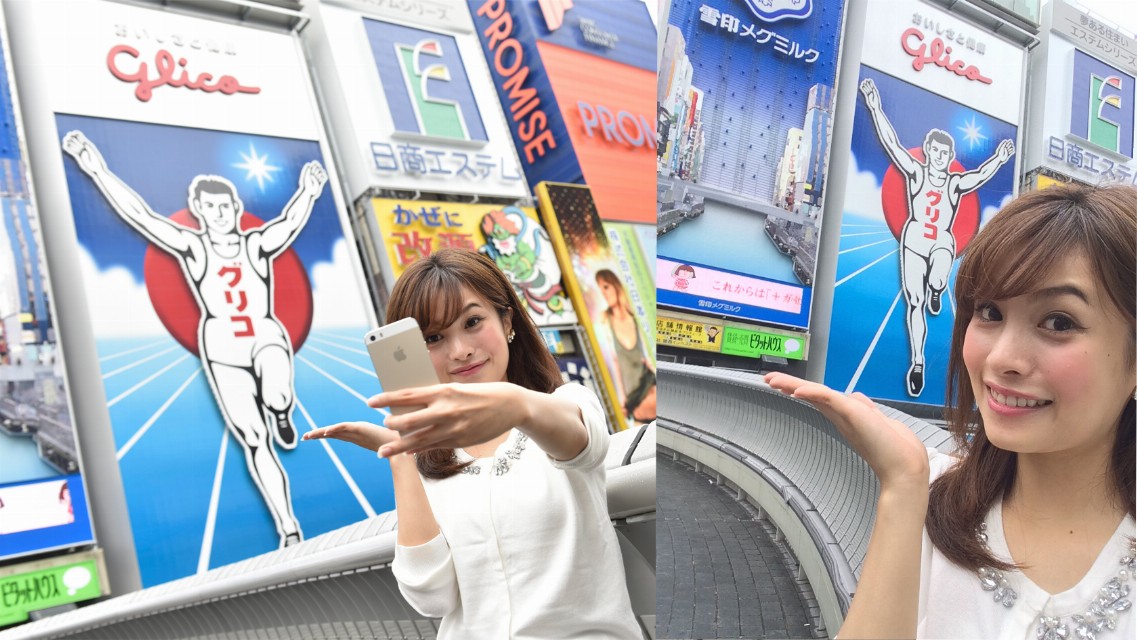
Method #3: mini-tripod
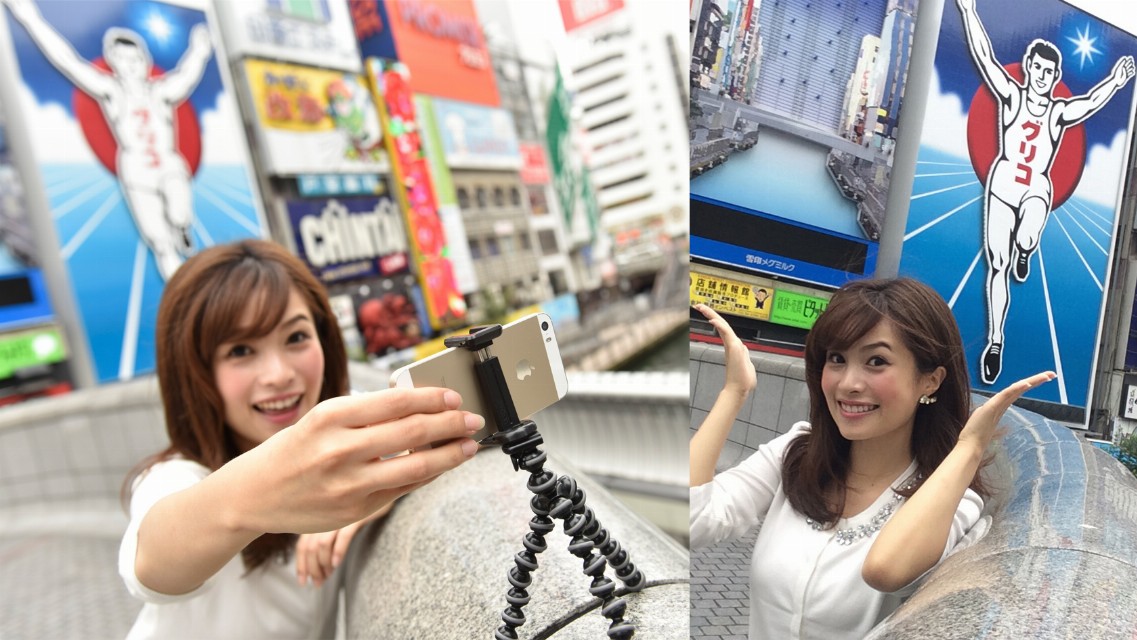
Finally, we tried the mini-tripod. Using the mini-tripod and the timer function, you can take a photo of yourself without having to hold the camera. Since both hands are free, you can perfectly replicate the pose. However, you can’t see how the photo is turning out and there is also the possibility of the phone falling off so please be careful!
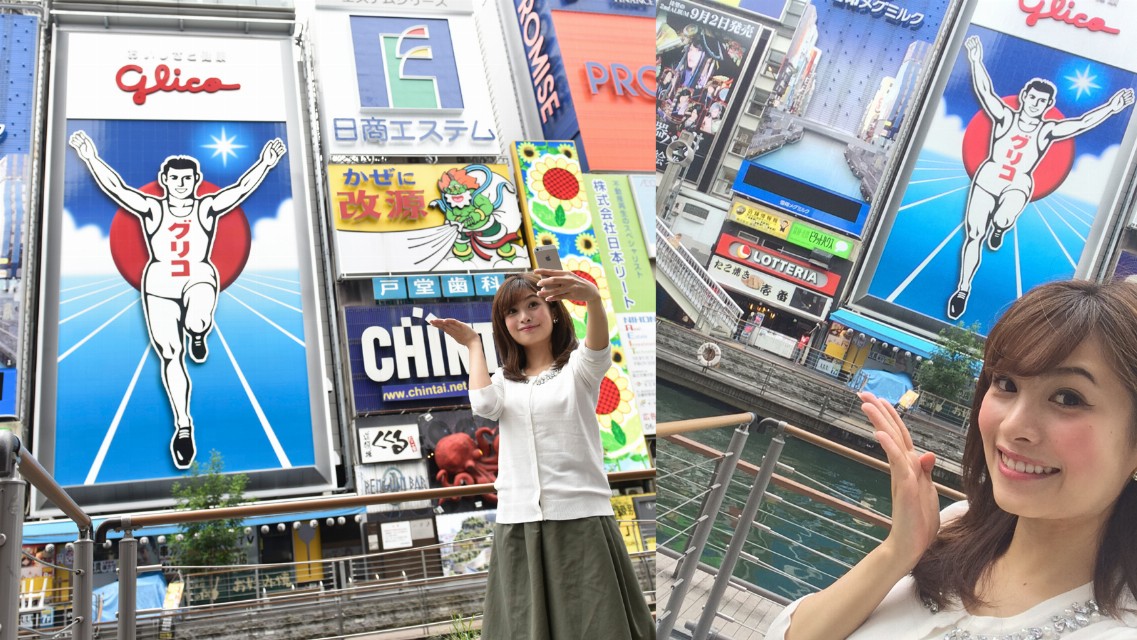
Method #4: Ask someone to take it for you
We asked someone in the area to take a photo of us. The railing is rather low so we were able to get a photo with great composition.
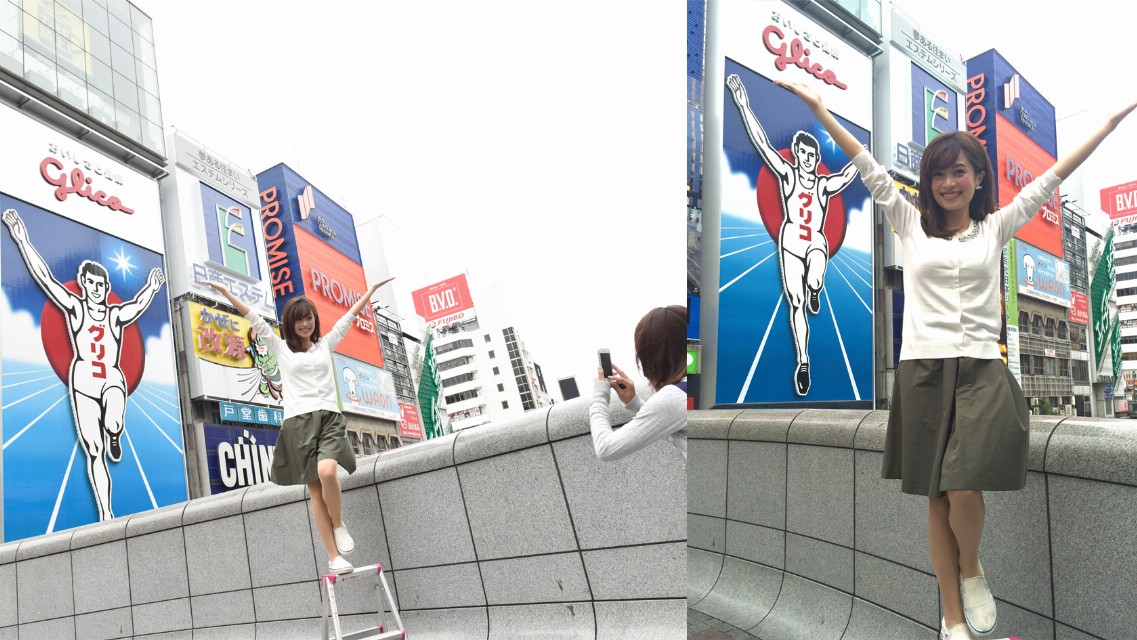
As we continued our research, we discovered that Ebisubashi’s railing often gets in the way. “What would it be like if we took it from a higher position?” We were able to take a lovely photo this way because putting the model higher closed the distance between her and the Glico sign.
We took many considerations about safety in account when we took this photo. Please don’t try this.
Thanks to this research, we discovered that using method #4, having someone take a photo for you, at location #2, the sidewalk, will result in the best photo! This is, of course, the staff’s subjective opinion. However, it might be difficult to ask someone and have them agree, so using a wide-angle lens or a selfie stick is also an option for a great photo.
Bonus location #4: Glico-ya
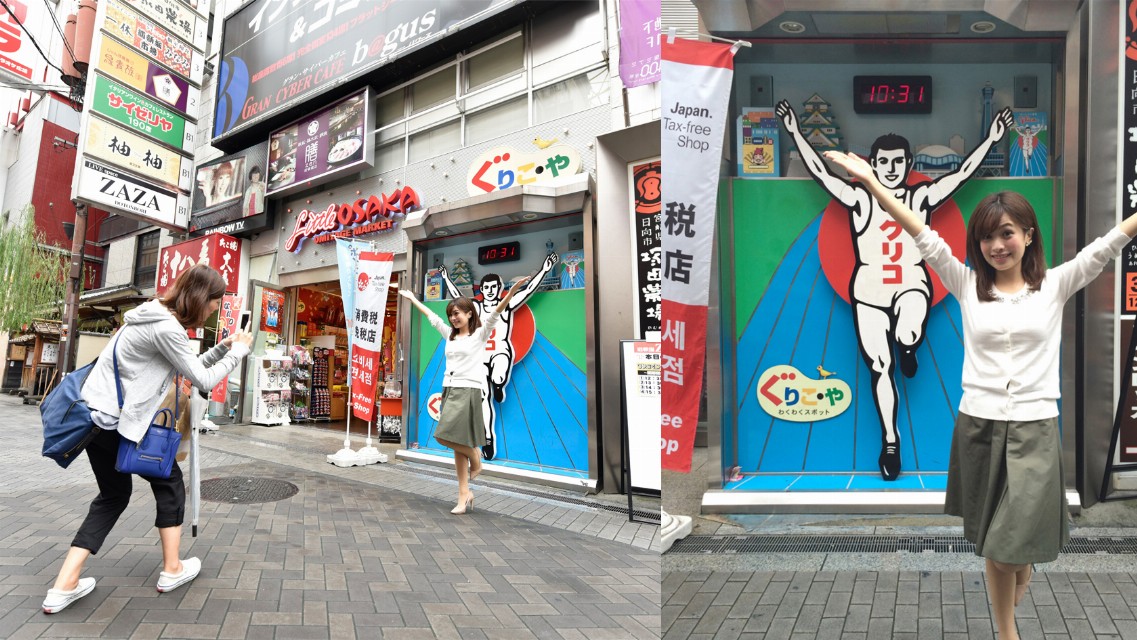
For people who want to take the perfect picture with the Glico sign, head to the mini Glico-sign in front of Glico-ya. Here you can get as close to it and take it from whatever angle you wish! If you have good luck, you might be able to see the Glico sign move both hands.